Getting started
Use the skills you have honed building spreadsheets to build apps. Calcapp Creator is our web-based app designer. (If you haven’t already, sign up for a free account.) Preview apps on any device using Calcapp Connect, available at connect.calcapp.net.
This tutorial builds a simple calculator that adds two numbers together. There is a video recap at the bottom of this page. You can watch it first for an overview or follow along step-by-step below.
Note: Calcapp is evolving rapidly, meaning that the videos on this website may reflect an older version. There is no audio.
Getting started
1. Sign in and create your app
Start Calcapp Creator and sign in. (Sign out by clicking the button.) You are greeted by templates you can use as starting points:
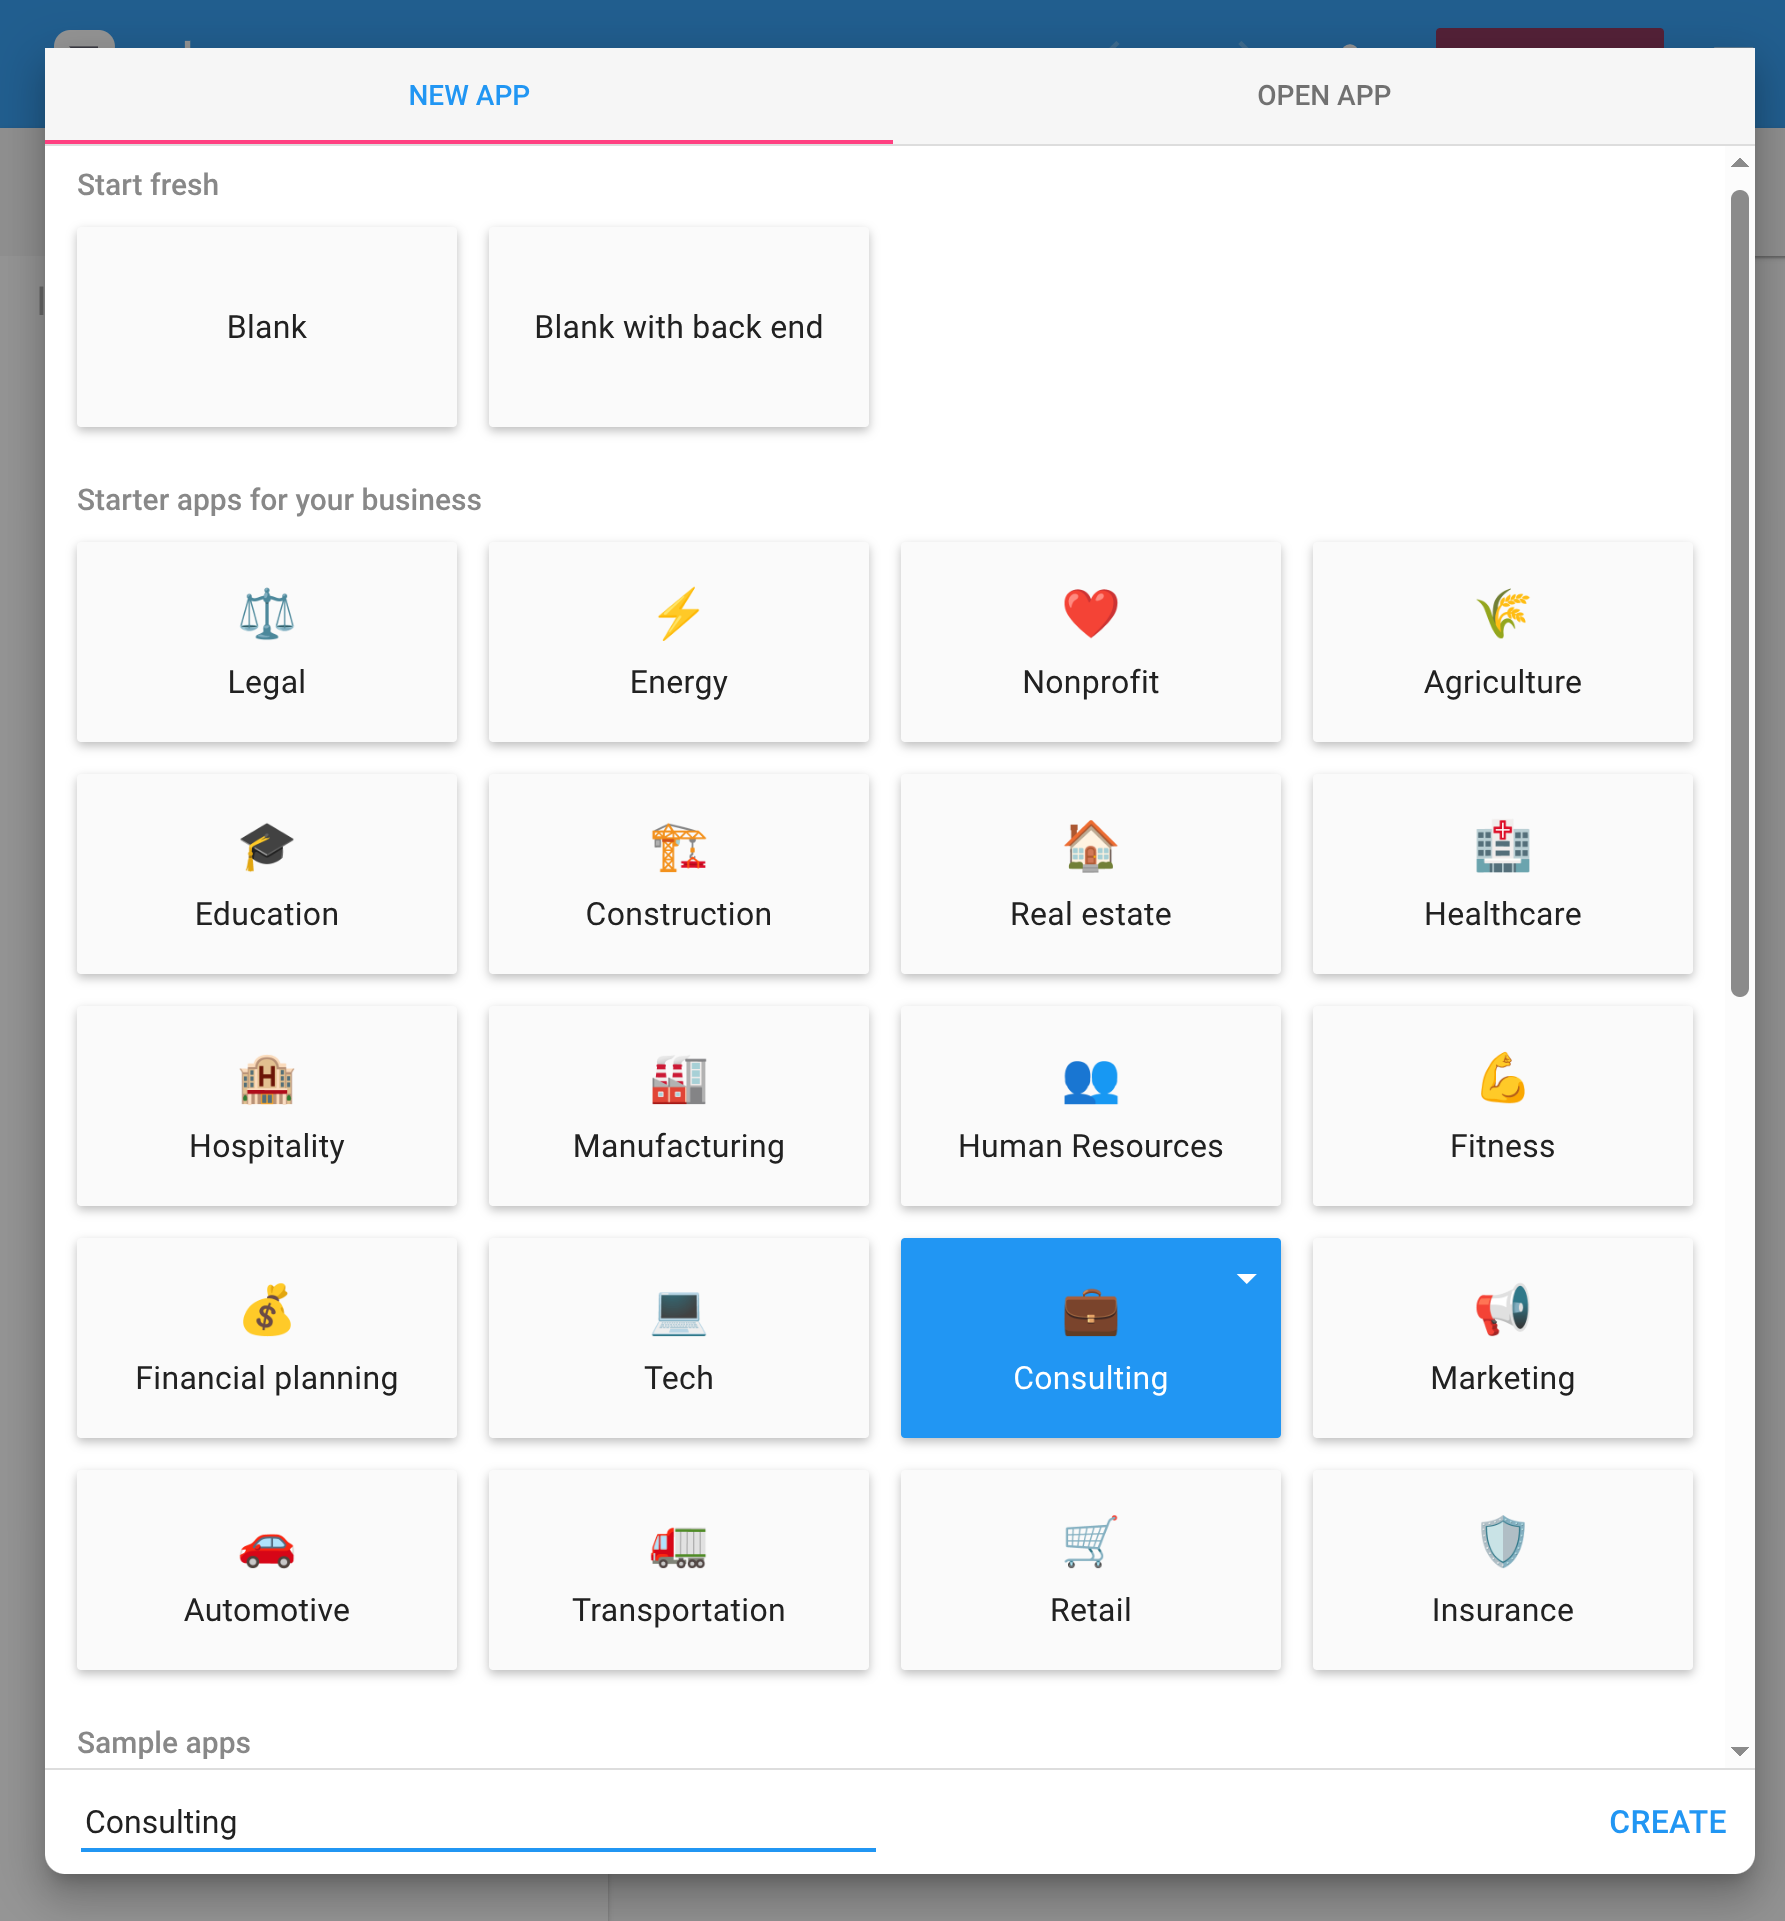
For a quick look at Calcapp’s features, you can start with the “Tour (start here)” template. You’ll also find templates demonstrating techniques like multi-level drop-downs and dynamic filtering — these are great for learning specific features once you’ve mastered the basics.
For this tutorial, start with a blank app (the “Blank” template should be pre-selected). Name your app on the line next to the Create button and press the button. You are taken to the start screen:
Press to continue to the next screen:
2. Create your first screen
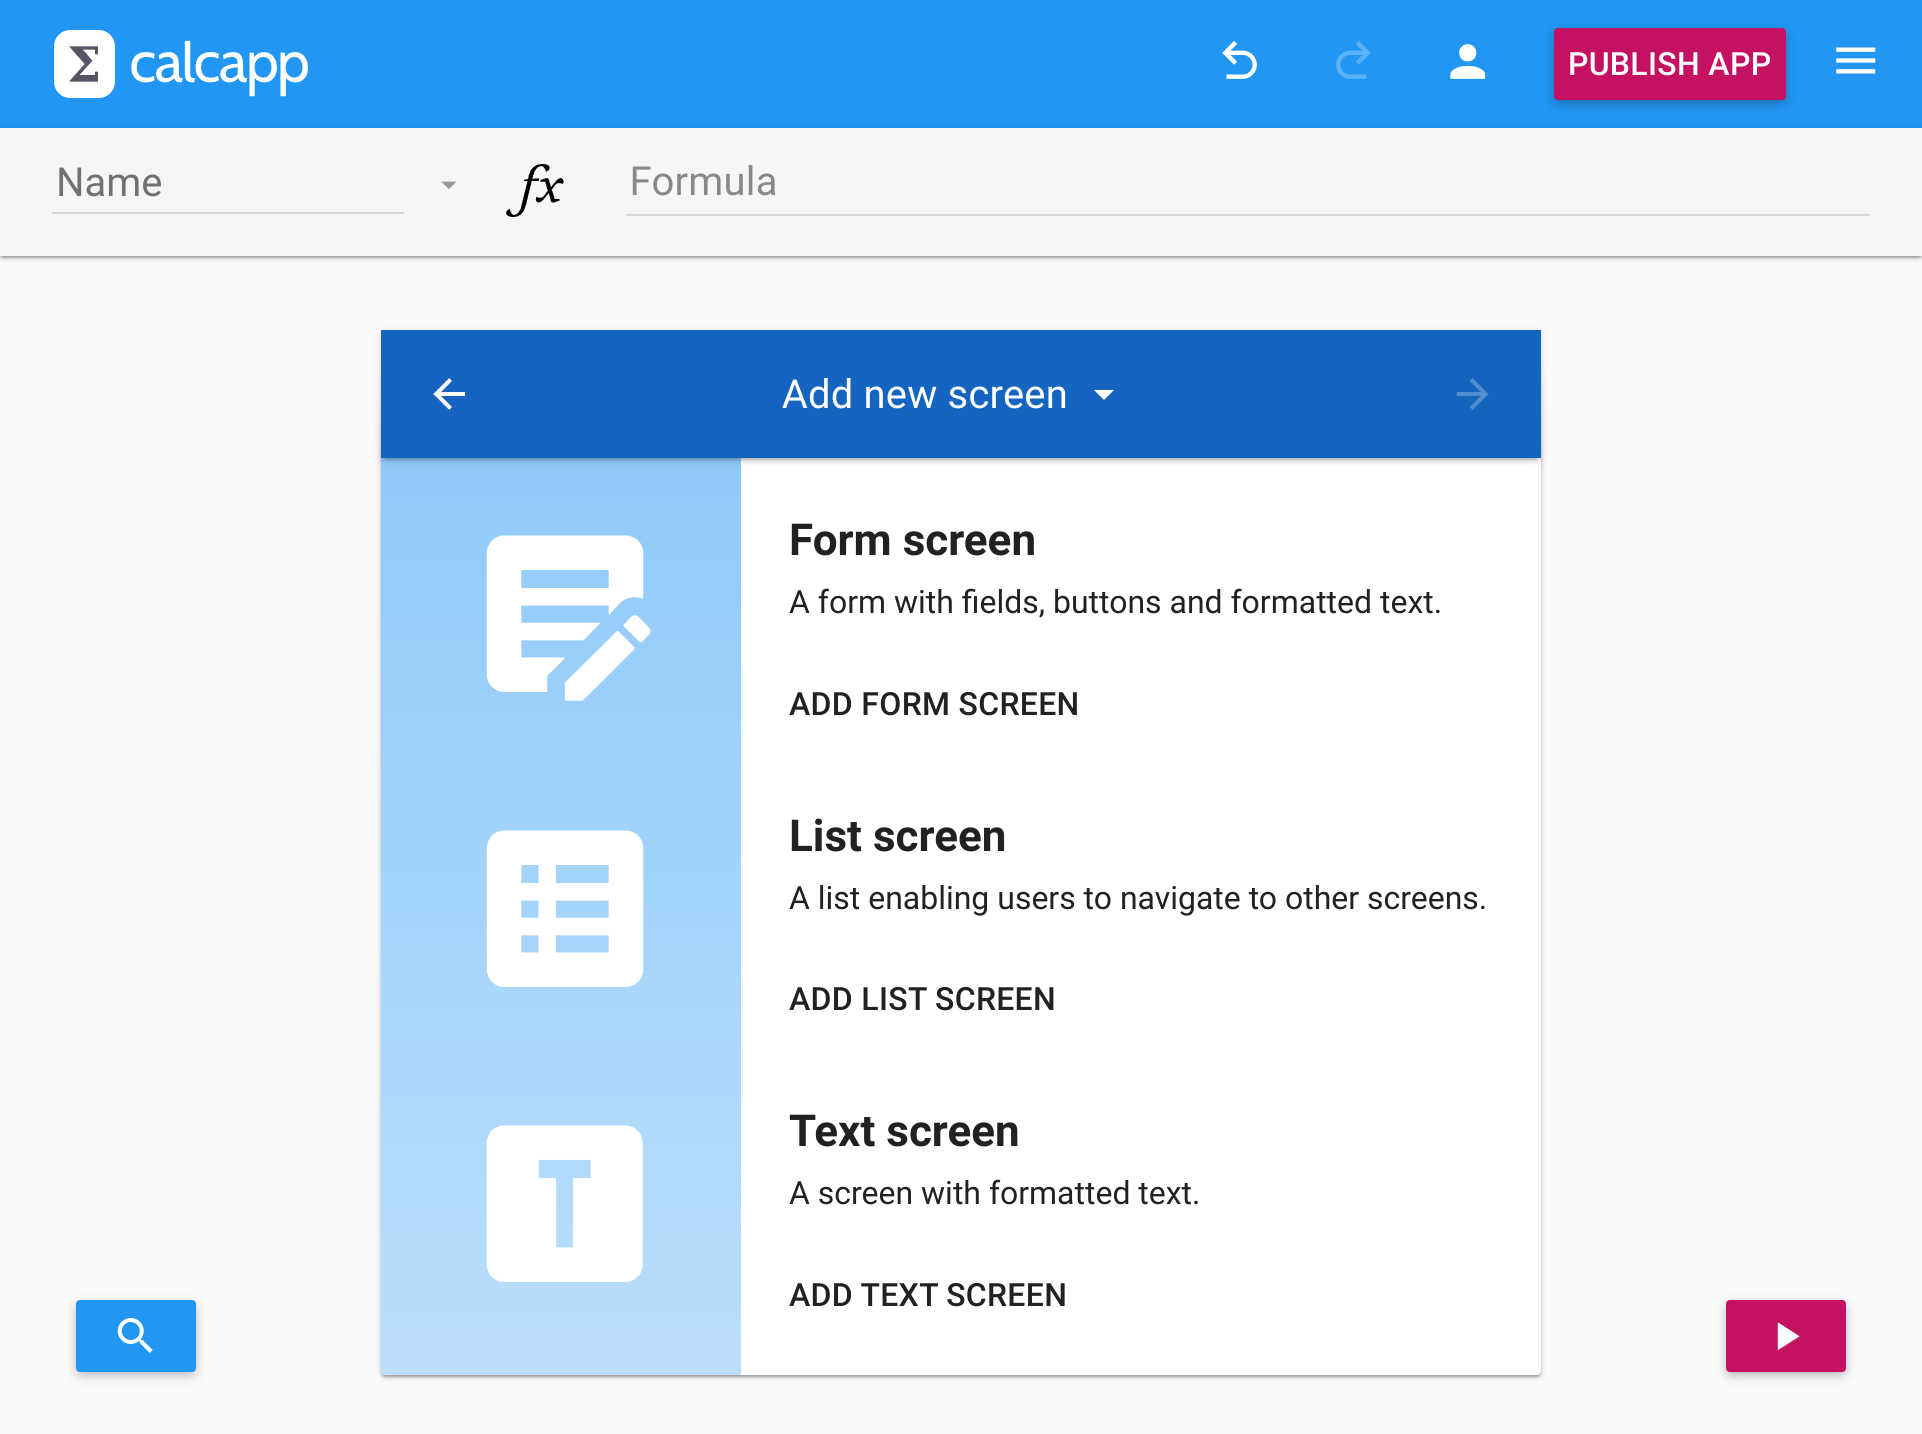
The apps you build with Calcapp consist of a number of screens that your users interact with. There are three different kinds, but for now, we’ll just consider the screen type you’re likely to use the most: form screens. Press the Add form screen button to create the first screen of your new app. You’re presented with this screen:
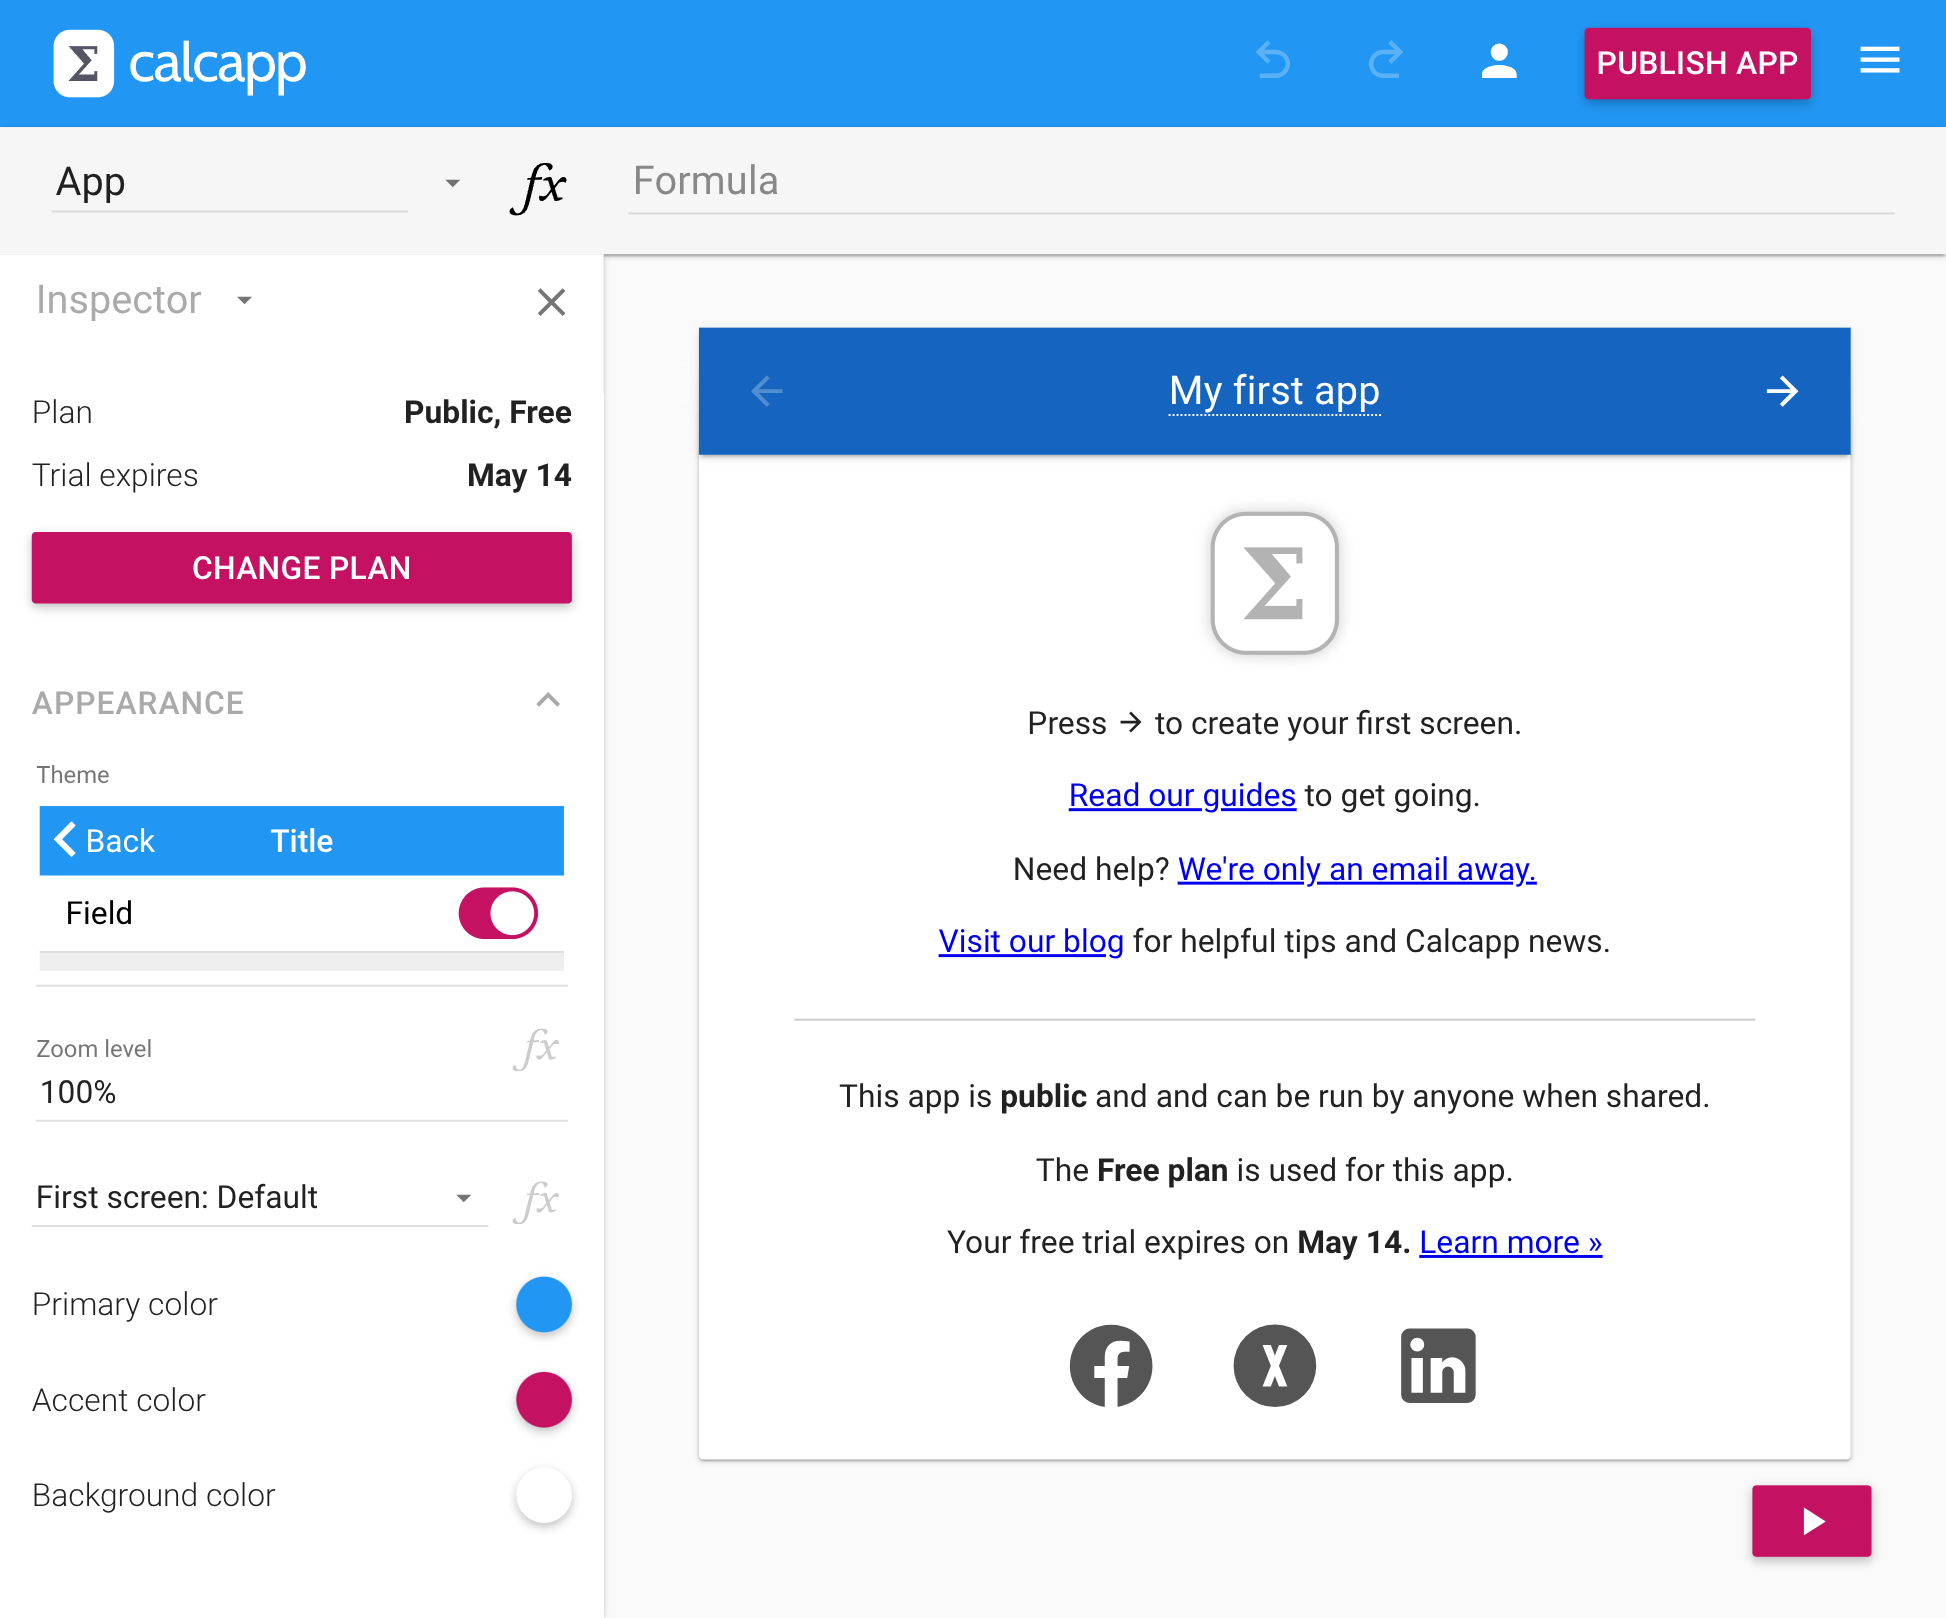
The window in the middle of the screen, with the blue bar at the top and the arrows, represents your app. By default, this is the first screen your users will see.
Try clicking the “Title” label. You’ll find that you can start editing the text right away. By doing so, you define a title for your screen, which appears at the top of your app screen when this screen is visible. All other labels which appear over dotted lines are also editable. Name the screen “Adder,” as we’re going to build a simple calculator which adds numbers together.
Building your calculator
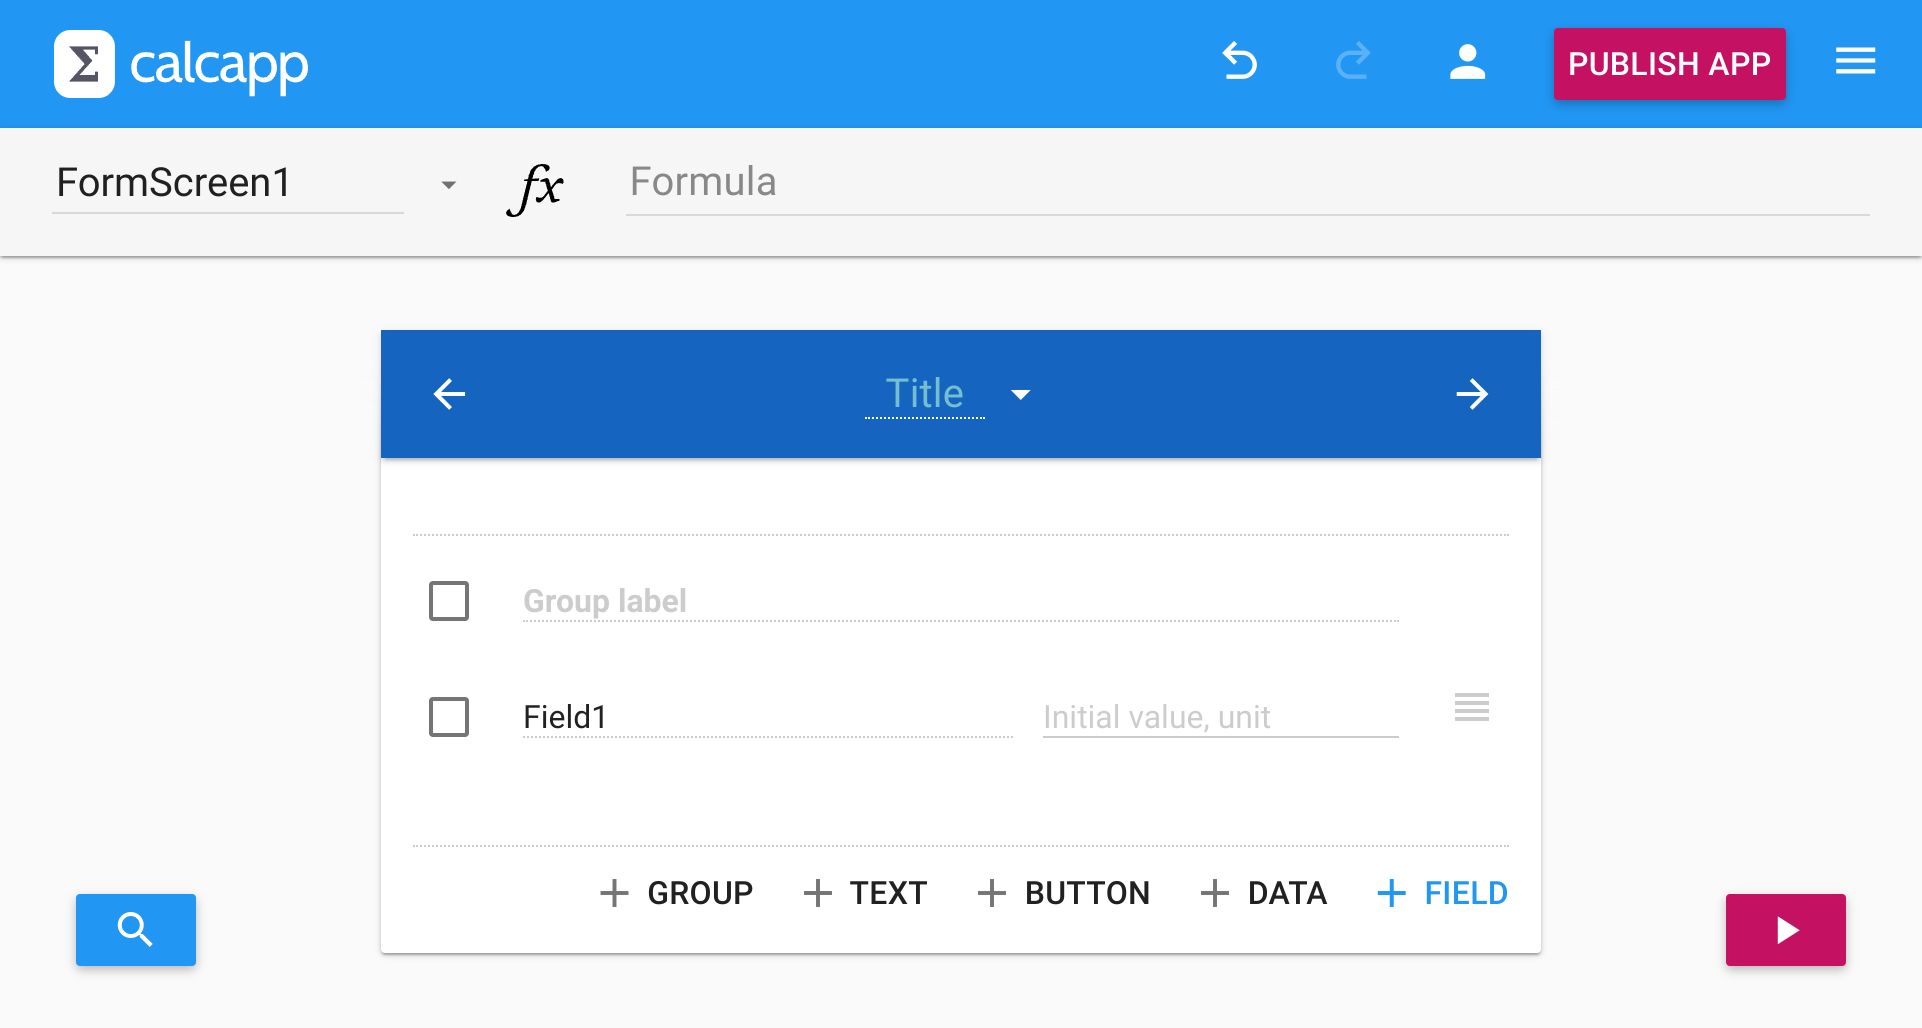
3. Add input fields
A form screen consists of form groups, which in turn contain the fields your users use to enter data. When you create a new form screen, a form group containing one field has already been created for you. Click the Add field button to create one new field.
You will find that the caption of the new field is pre-selected. Simply start typing to give it the caption “Second number.” Change the caption of the first field (“Field1”) to “First number”:
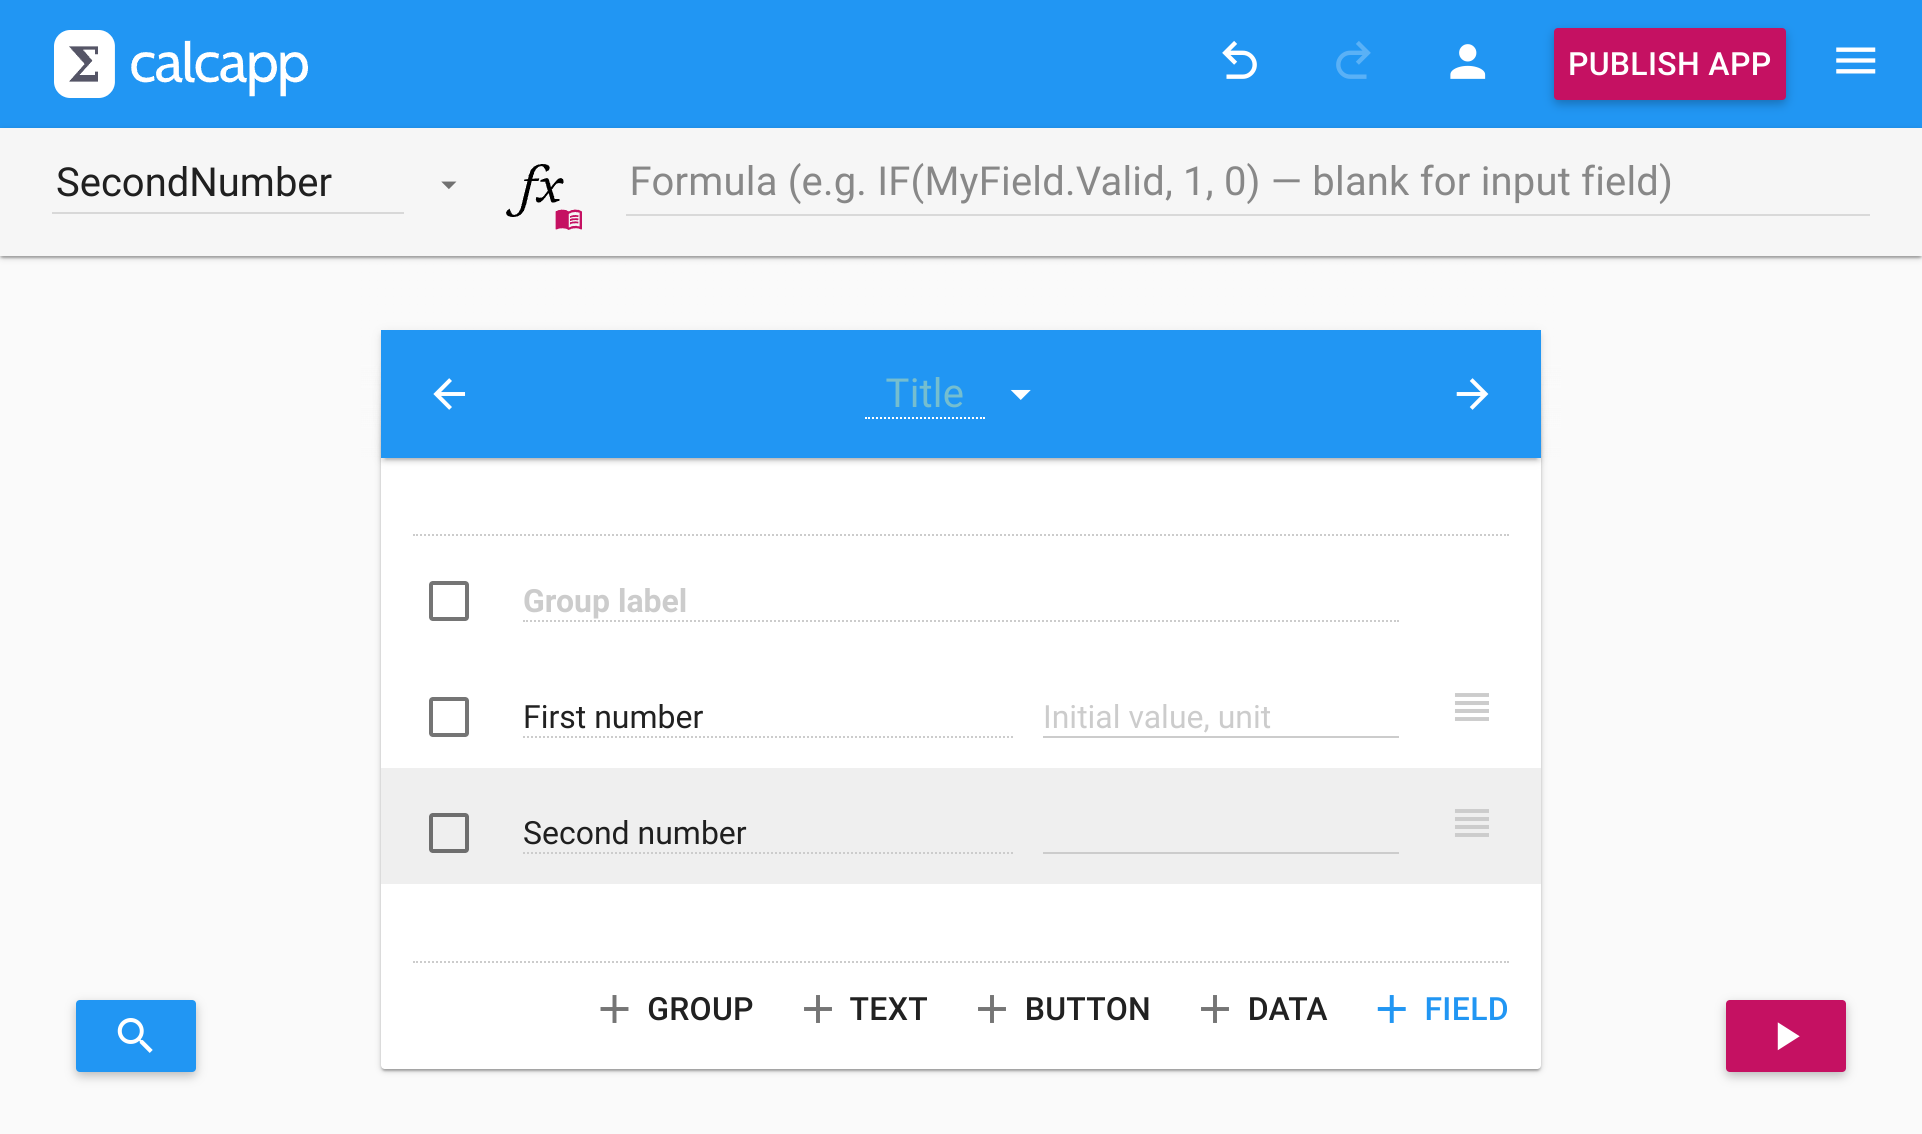
4. Name your fields
In spreadsheets, you can refer to cells in formulas using either their positions (such as “D4”) or their names. In Calcapp, you can only reference fields using their names. As a result, all fields have names, whether they have been assigned manually by you or automatically by Calcapp Creator. To learn the name of a field or to change it, use the name box:
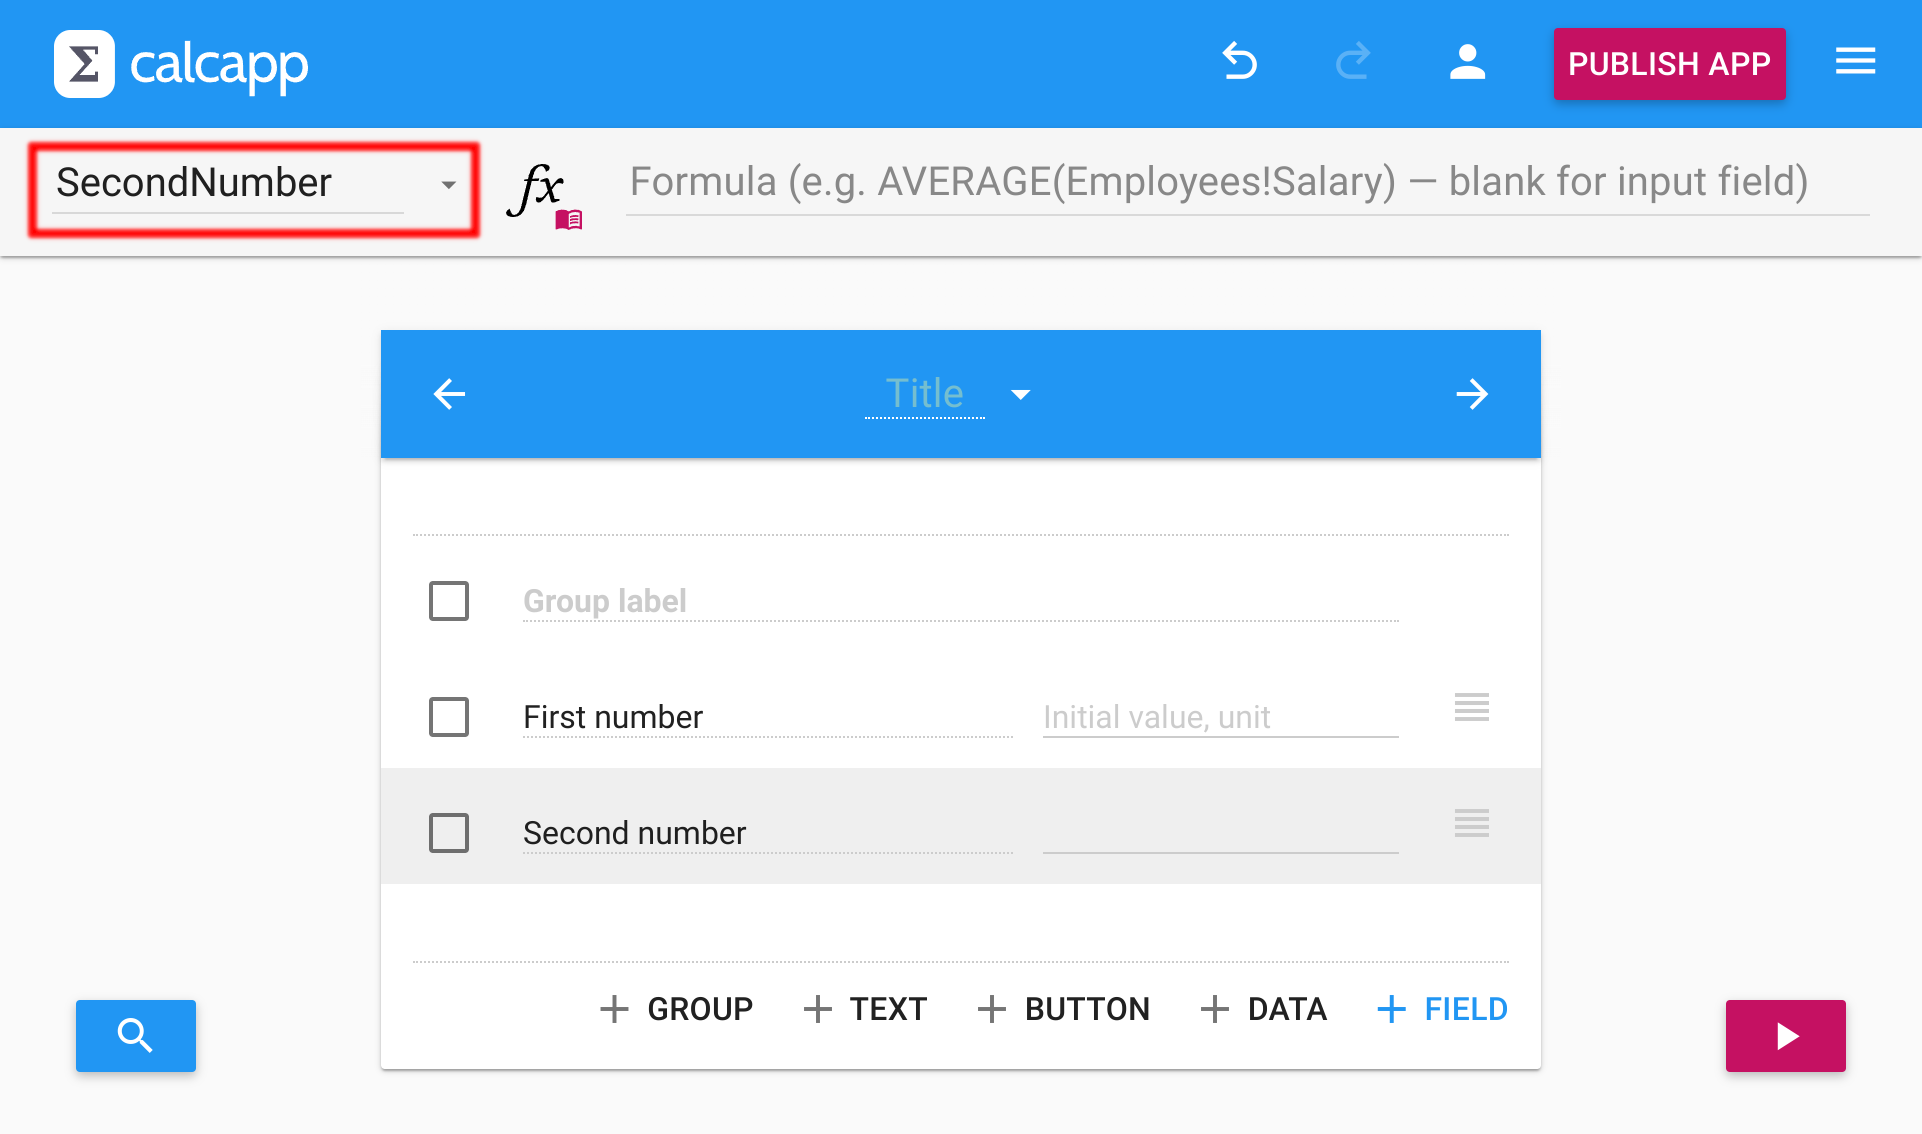
When you change the caption of a field, Calcapp Creator assigns a field name based on that caption (unless you have changed the name manually). When you typed “Second number,” the field was automatically named “SecondNumber” (field names cannot have spaces in them).
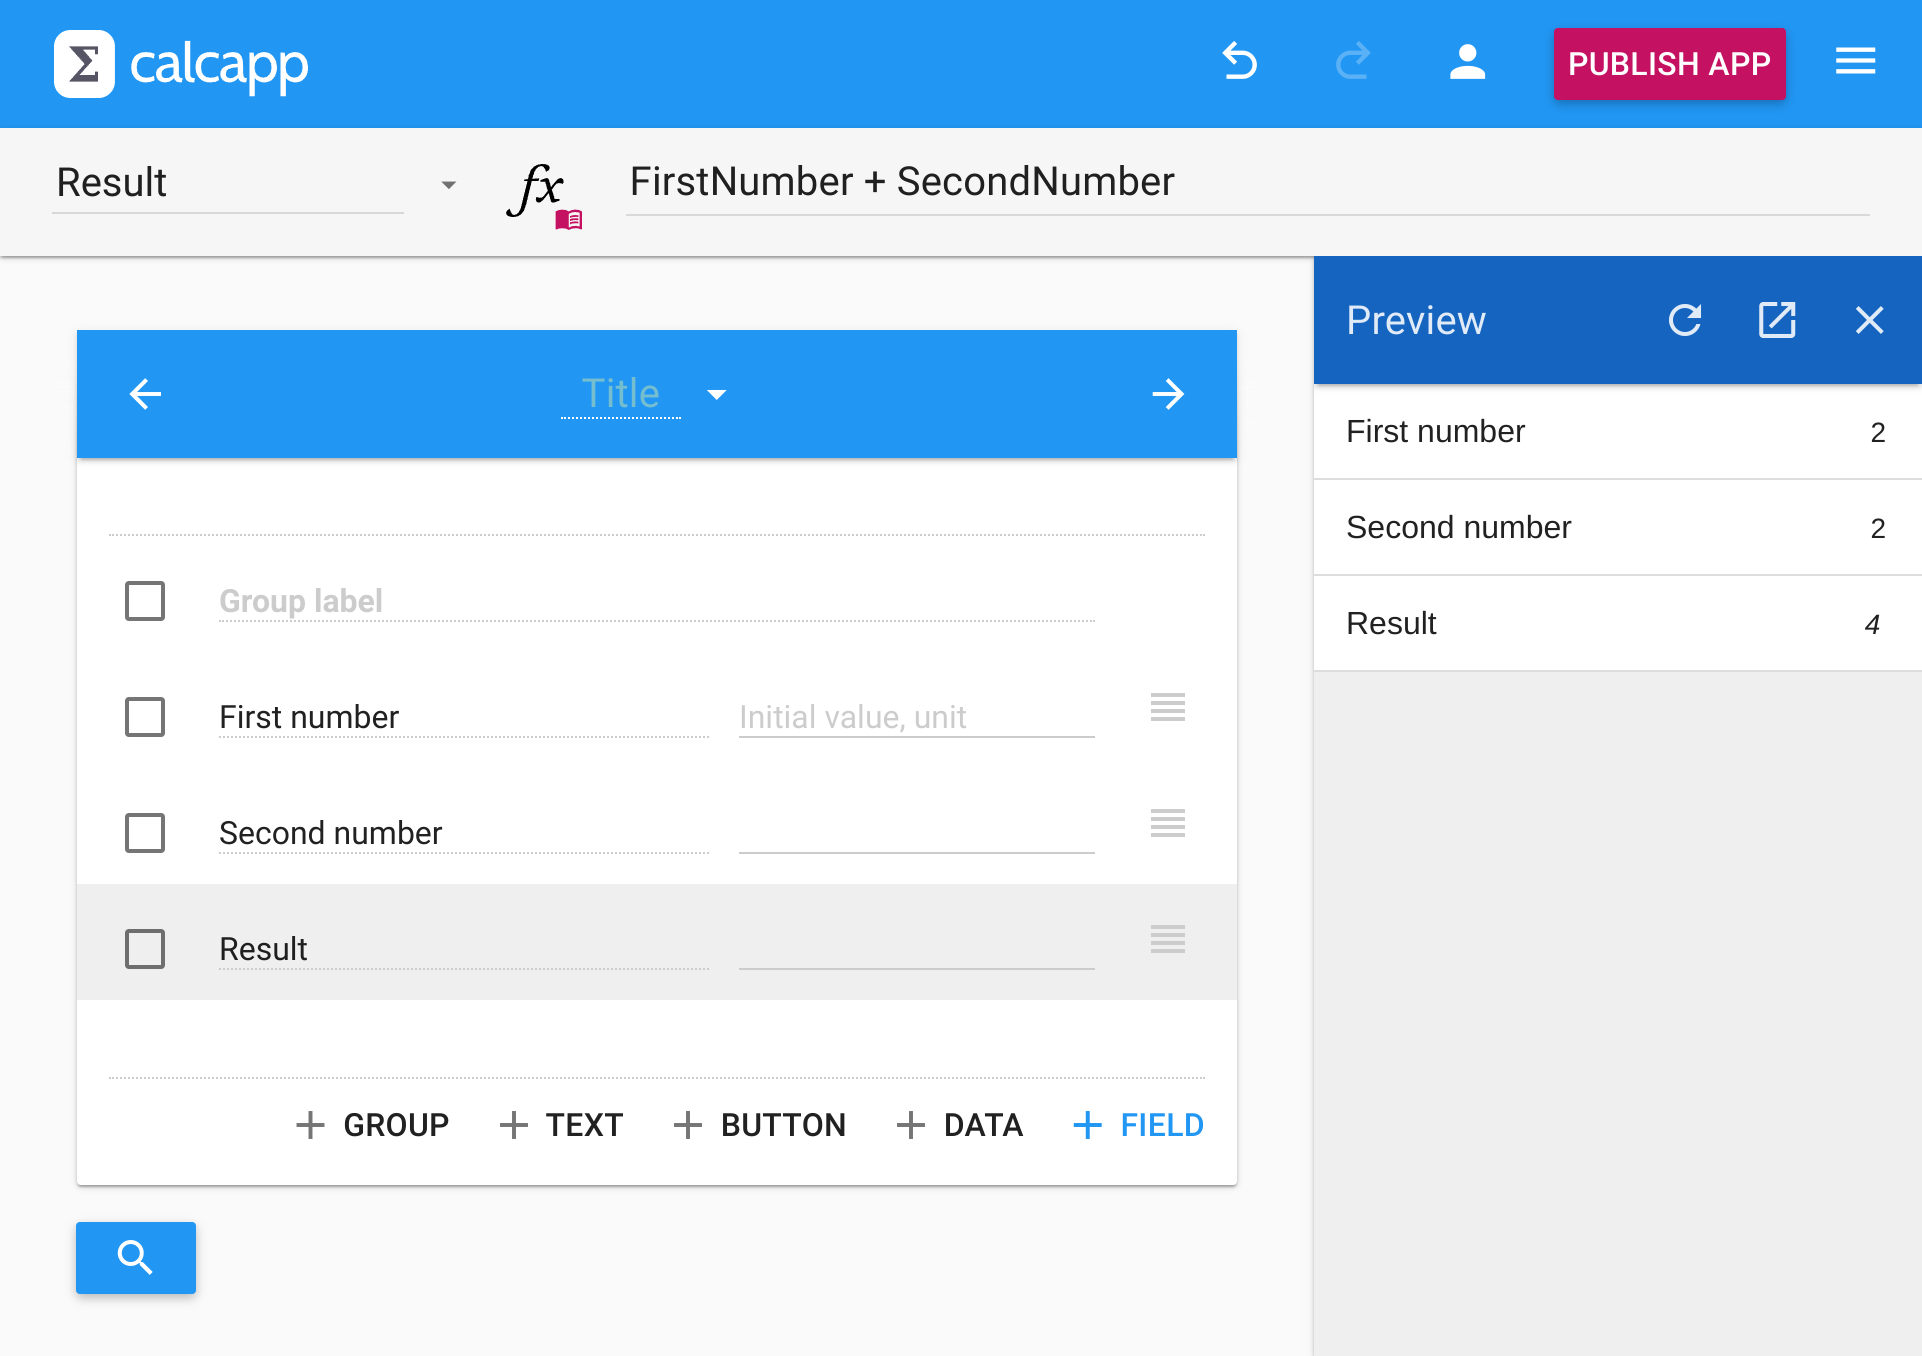
5. Add a result field and formula
Add a new field with its caption set to “Result.” We will now assign a formula to the result field using the formula field:
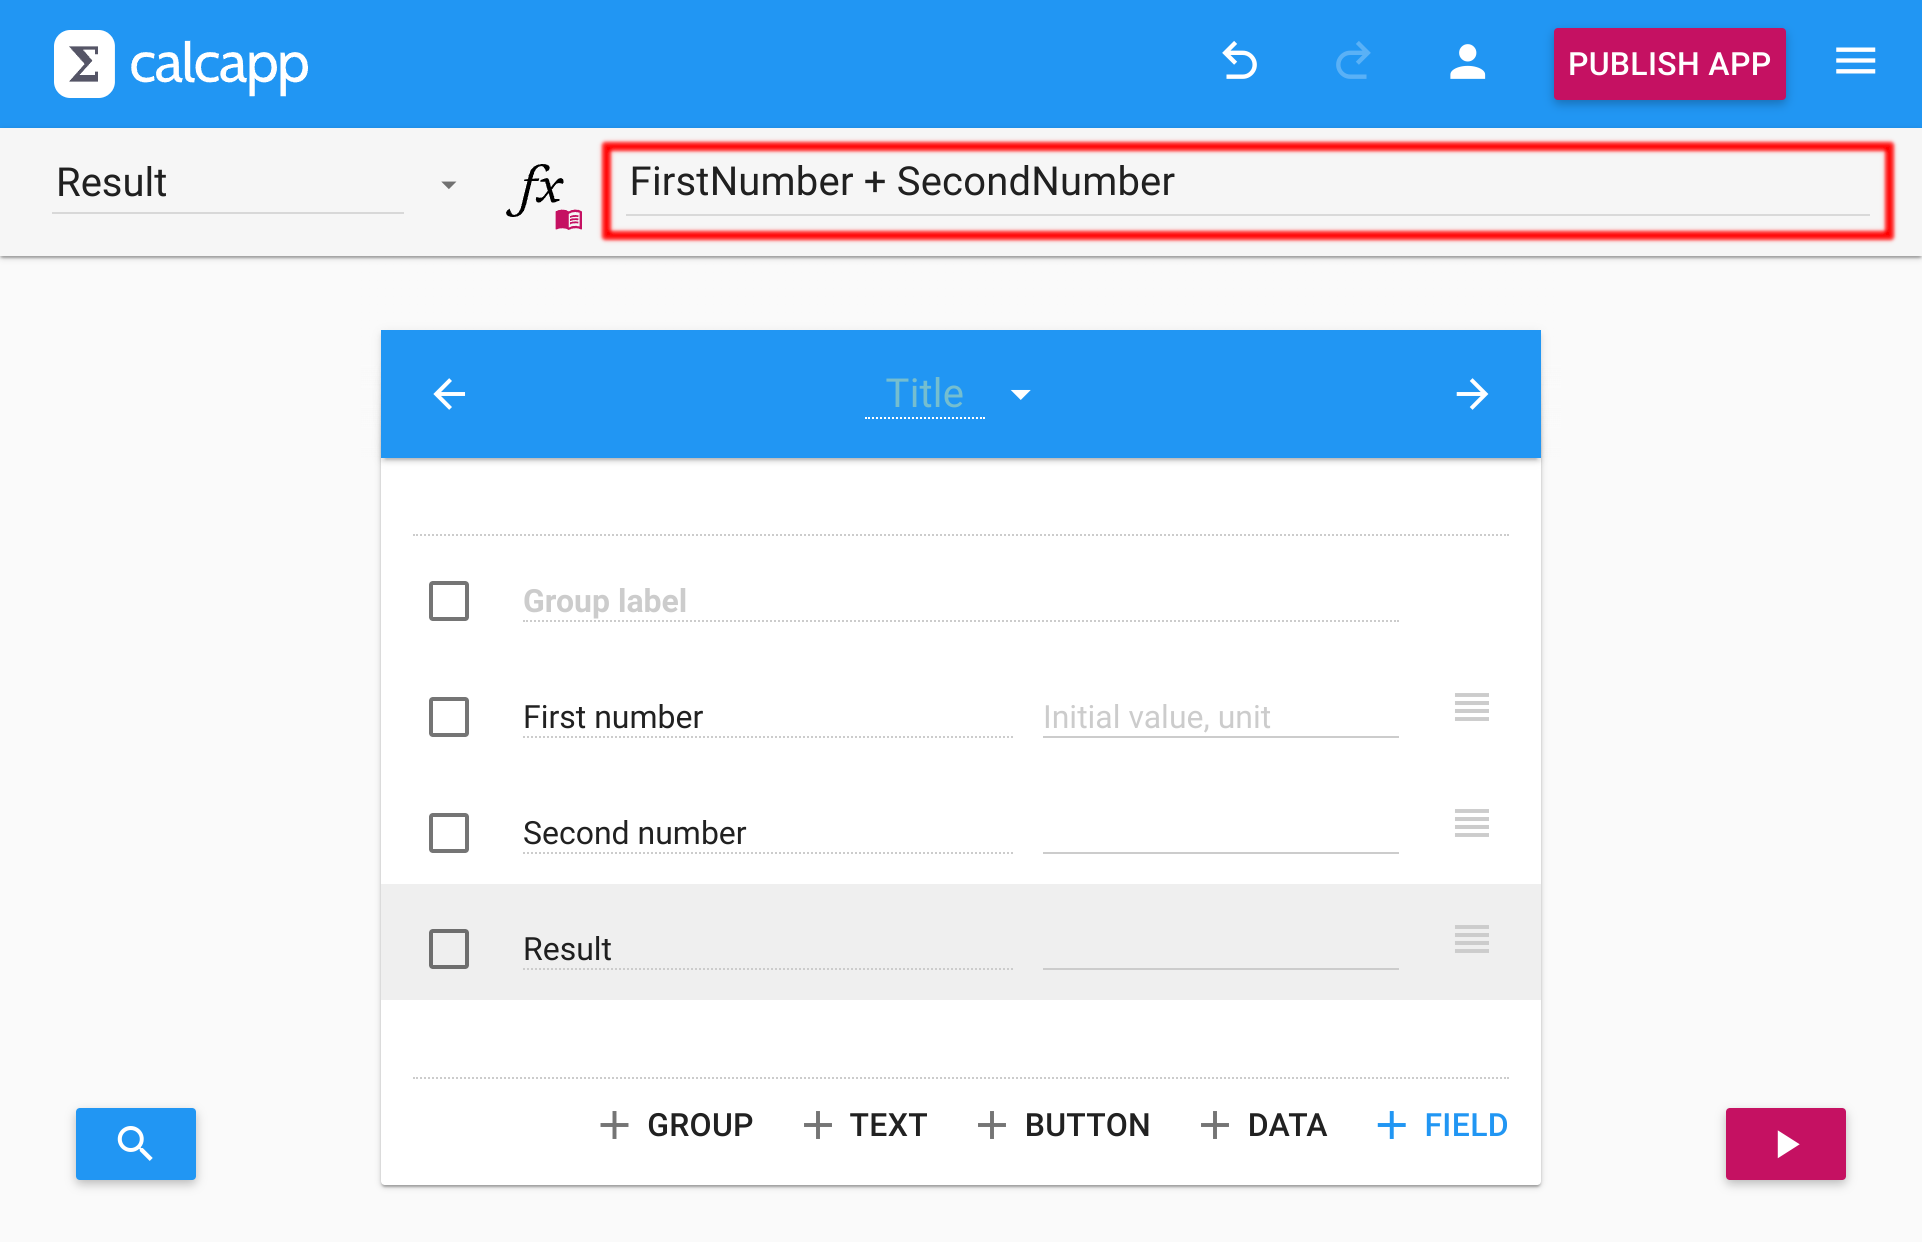
The formula field works the same way it does in a spreadsheet: It displays the formula of the currently-selected item and allows you to edit it. Unlike a spreadsheet, the formula field is always empty when you select an input field. Also, while you’re welcome to start formulas with an equals sign (“=”), you don’t have to. Resize the formula field by dragging its bottom edge.
Calcapp’s formulas are covered in another guide, but they are very similar to what you’re used to if you have experience with spreadsheets. To make the result field add the two numbers together, simply enter this formula into the formula field:
(When you’re editing formulas, you can also point and click at fields instead of typing their names manually. You can also start typing the name or label of a field, and the autocomplete feature will suggest the proper way to reference it.)
Testing your app
6. Preview in Calcapp Creator
That’s it! You have just built an app that adds two numbers together. You can get a preview using Calcapp Creator itself by pressing the play button in the lower-right corner:
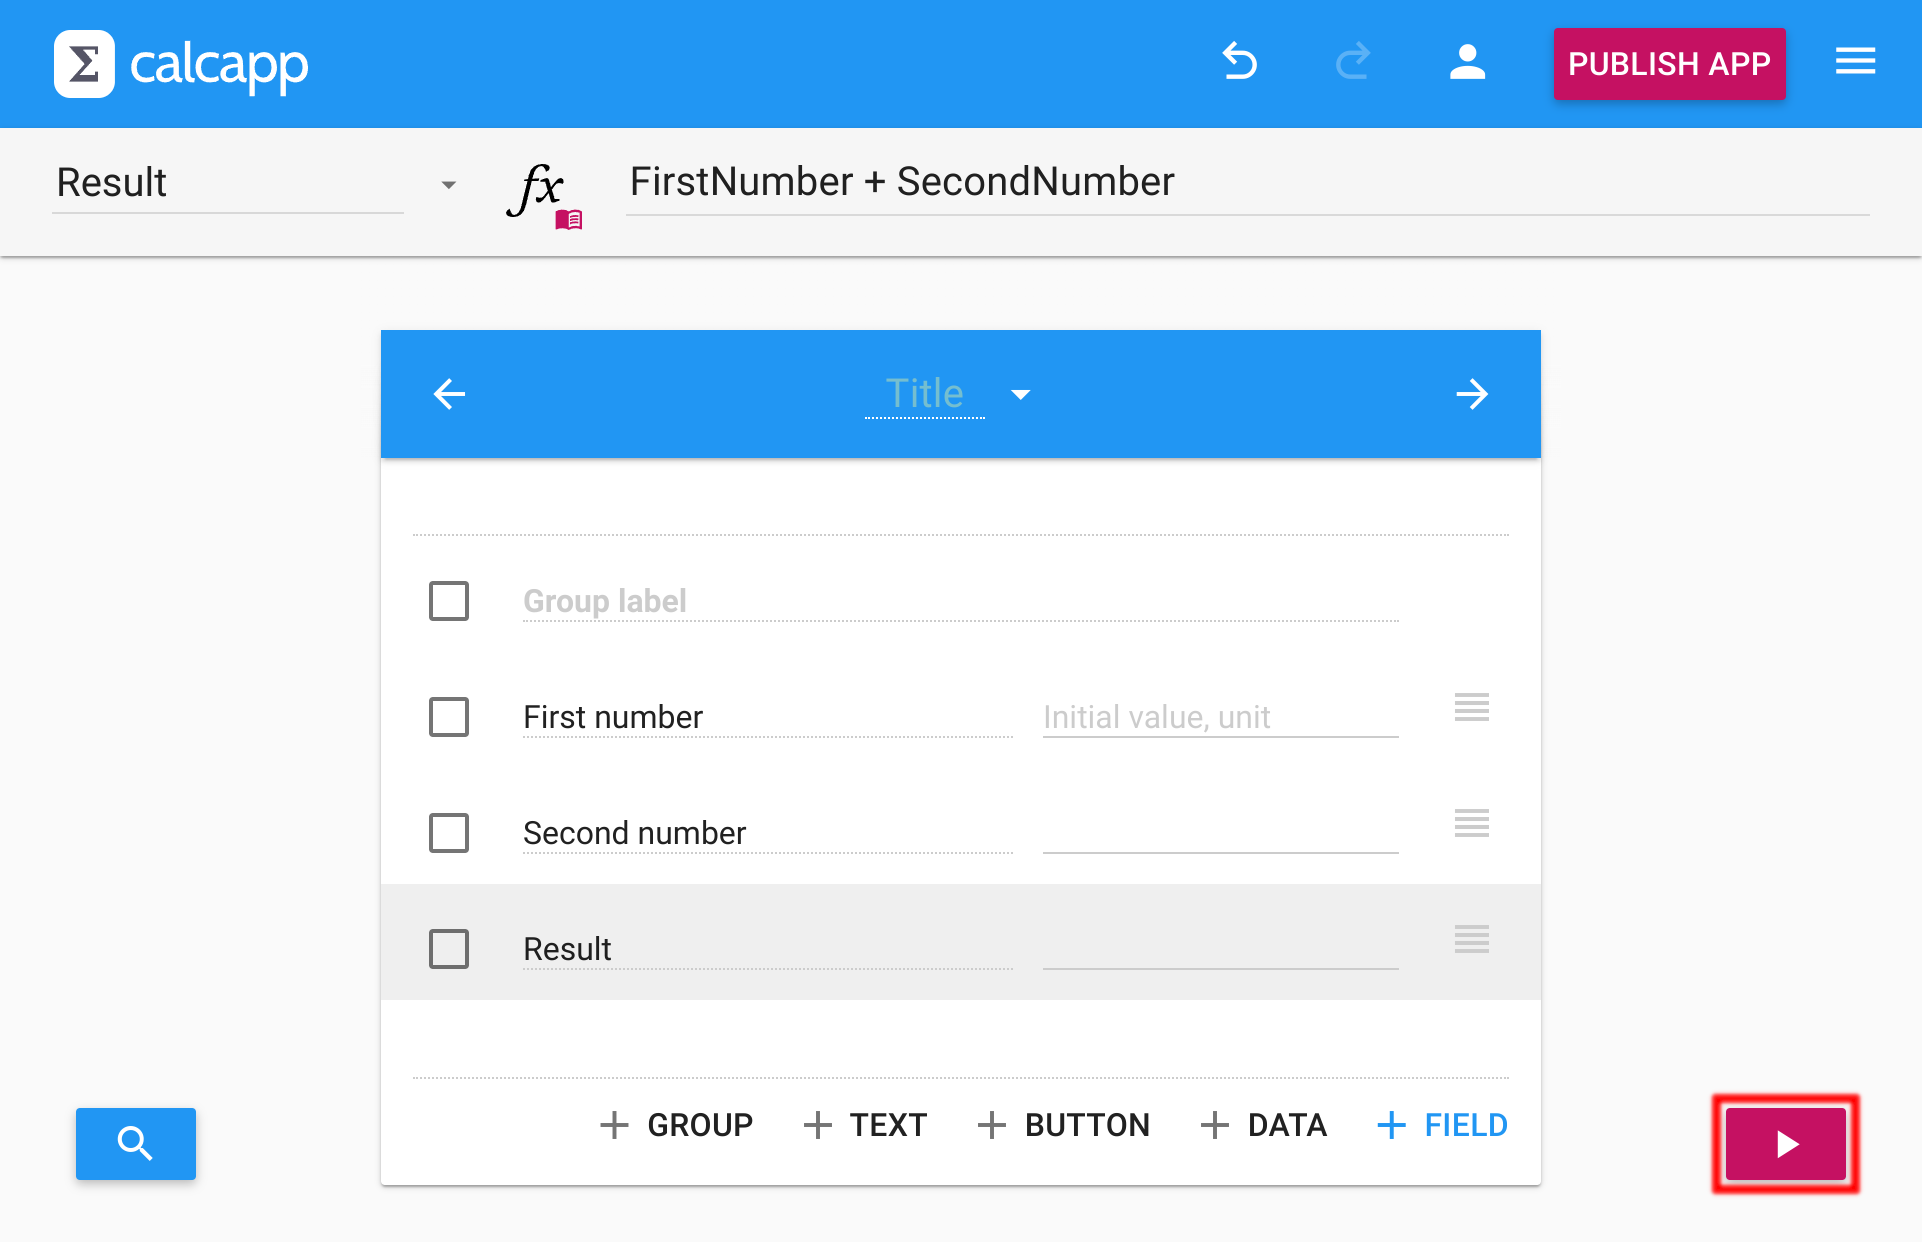
Press the button, and you’re presented with a preview of your app:
Note: Unlike spreadsheets, calculations only happen when you run the app. Calcapp Creator is for designing apps, Calcapp Connect is for running them.
When you make changes to your app in the app designer, the refresh button turns red to indicate that the preview needs to be refreshed.
7. Test on other devices
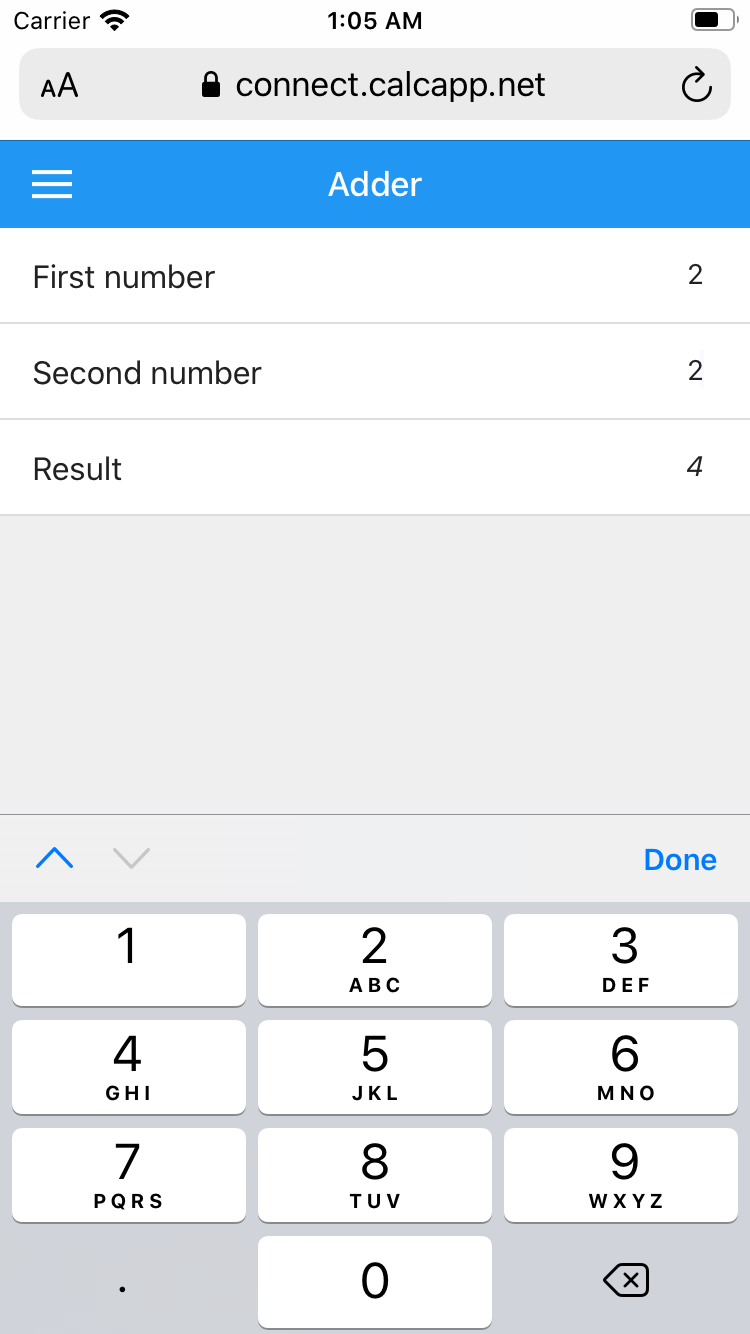
To run your app outside of Calcapp Creator — such as on a smartphone or tablet — browse to connect.calcapp.net using a web browser. Sign in using the same credentials you used with Calcapp Creator. If you have created multiple apps, you will be asked to select which one to work with. Your app will appear much as it did in Calcapp Creator’s preview sidebar:
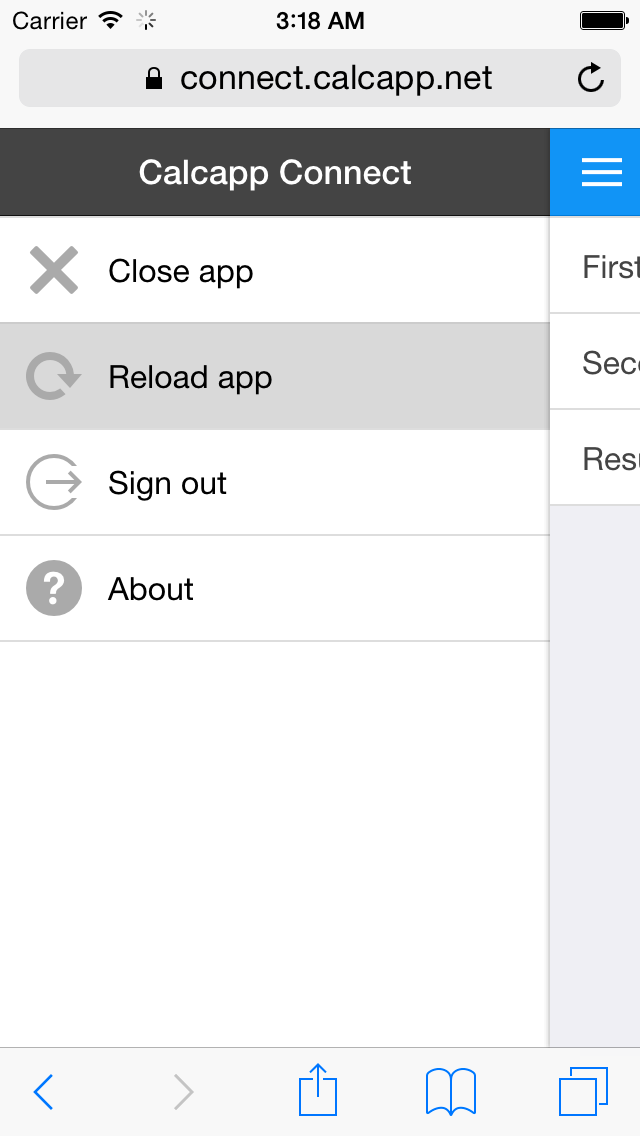
While building your app, you can elect not to use Calcapp Creator’s preview sidebar and instead preview your app using Calcapp Connect on a mobile device. To refresh the app preview, press the menu button in the upper-right corner and select Reload app:
Customizing your app (optional)
You can customize your app’s appearance and behavior before sharing it:
Language and formatting: If you don’t want your app to be in US English, select the language in the inspector on the left-hand side. The language you select determines how numbers, dates and times are formatted in the apps you create (with a decimal point if the chosen language is English and with a decimal comma if the chosen language is German, for instance).
Logo: Set a custom logo by clicking the images in the Logo section. The first image you set is displayed on the loading screen and the second image on your users’ home screens when they install your app. (If you change your logo later, users may need to remove the app from their home screen and install it once more in order to get the new logo.)
App name and zoom: Click the label that reads My first app to change the app name. To make the app appear larger or smaller, change the zoom level above the language selector.
Tips for efficient development
Keyboard shortcuts: To work more effectively with Calcapp Creator, learn the keyboard shortcuts. Switch between a field and the formula field and back again by pressing Enter and move to the next or previous item using the arrow keys. A full list is available from the menu.
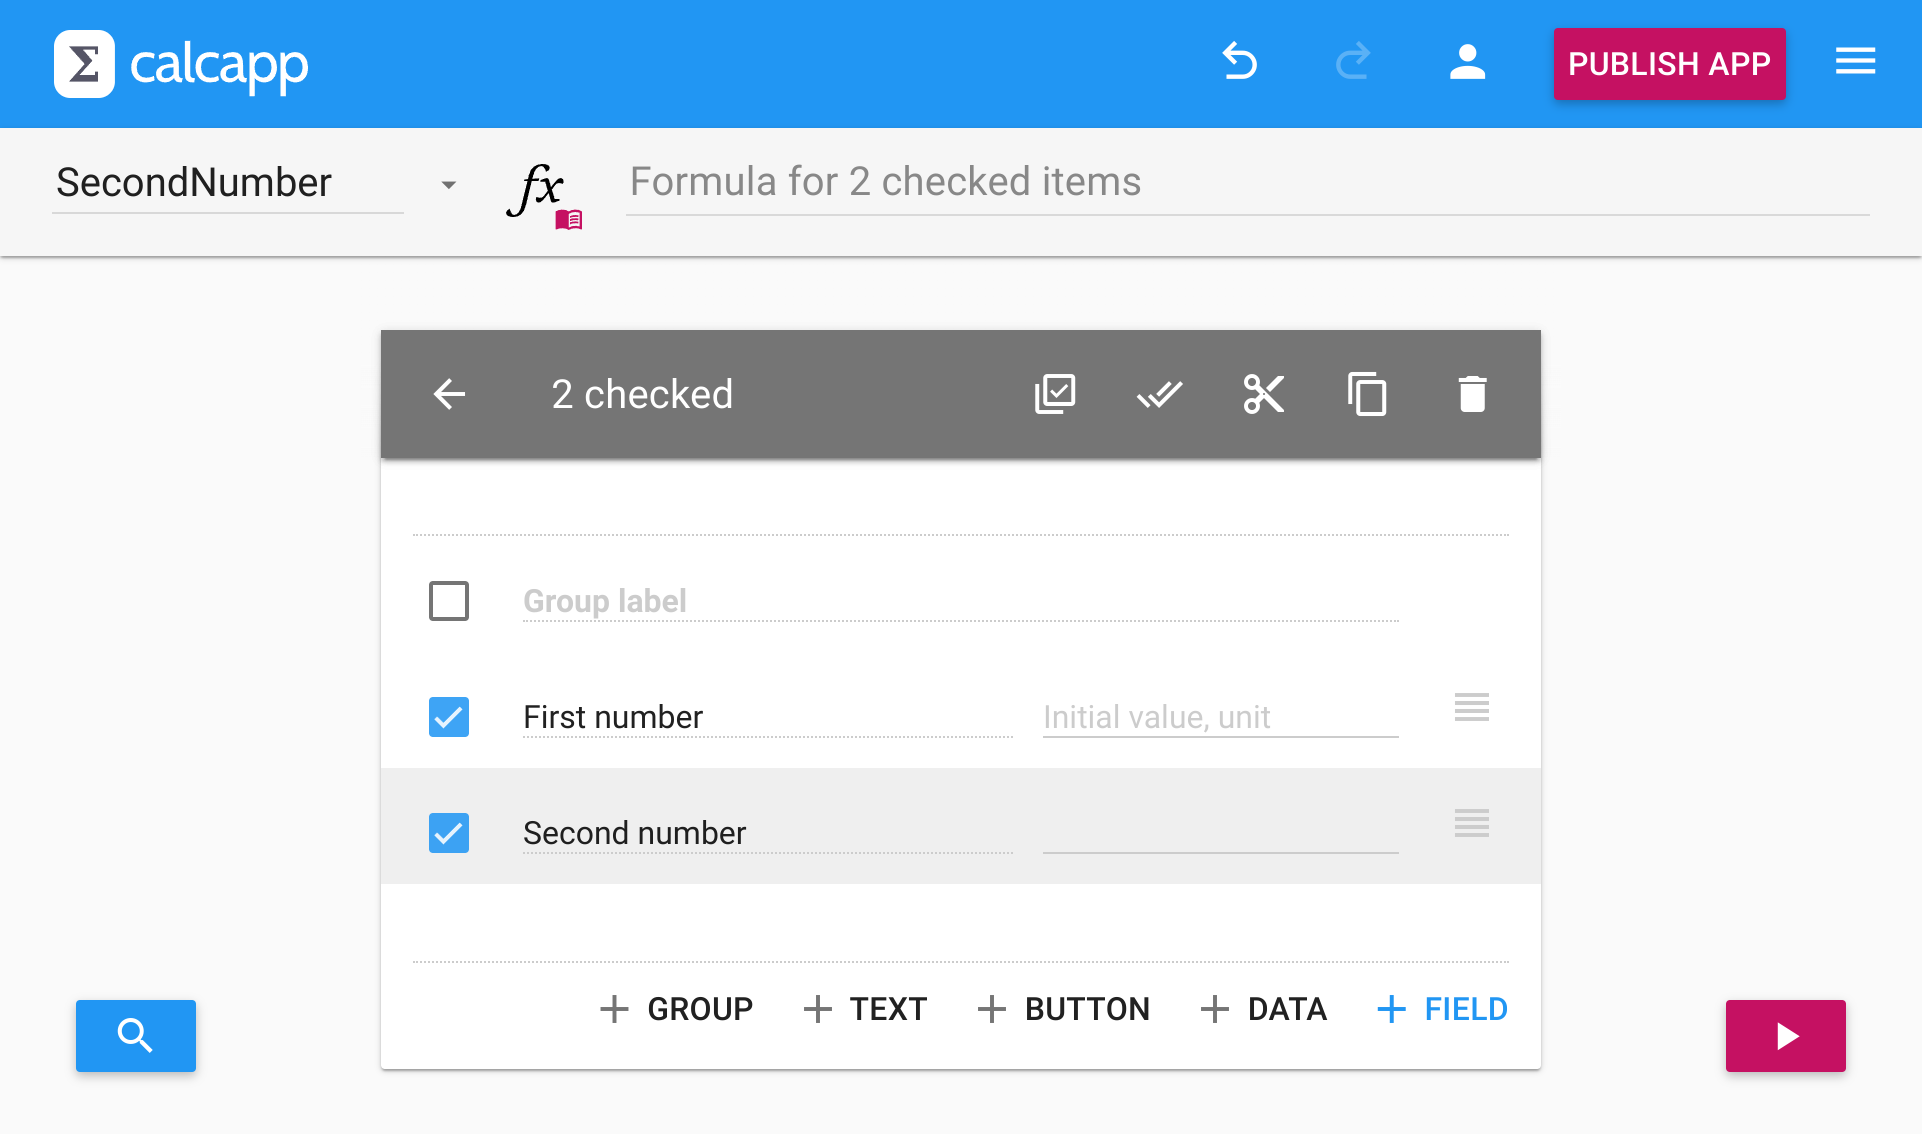
Field management: To change the order of fields, click and drag the symbols to the right of the fields. To remove fields or to cut or copy them to the clipboard, click the check boxes to the left of the fields and then the buttons in the gray toolbar ( to remove fields, to move them to the clipboard and to copy them to the clipboard):
App management: You can use the Open app tab to rename, delete and duplicate apps. Make backup copies of your apps by duplicating them.
Field naming: Don’t be afraid to change your field names after you’ve used them in formulas. Calcapp Creator automatically updates all formulas when you rename fields.
Video recap
Congratulations, you have finished building your first app! Now that you have learned the basics, continue reading about publishing the apps you build »